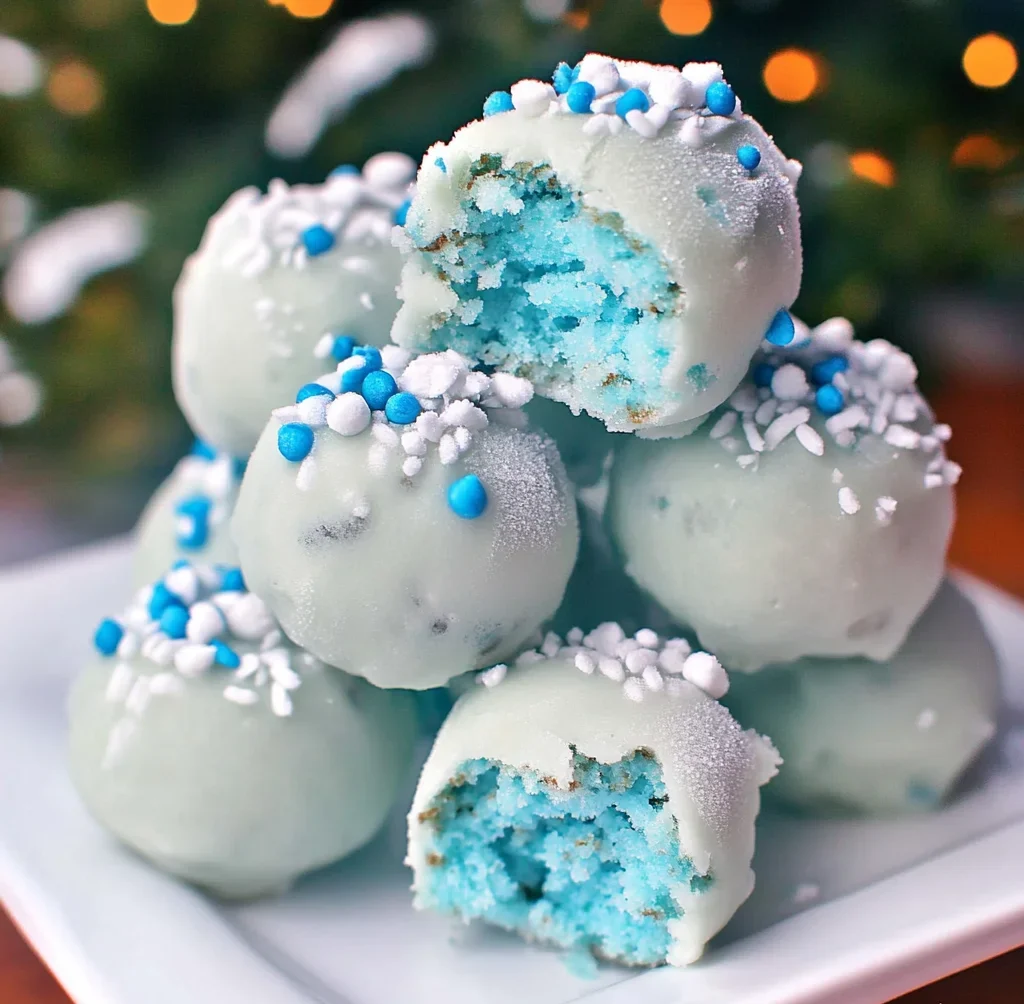
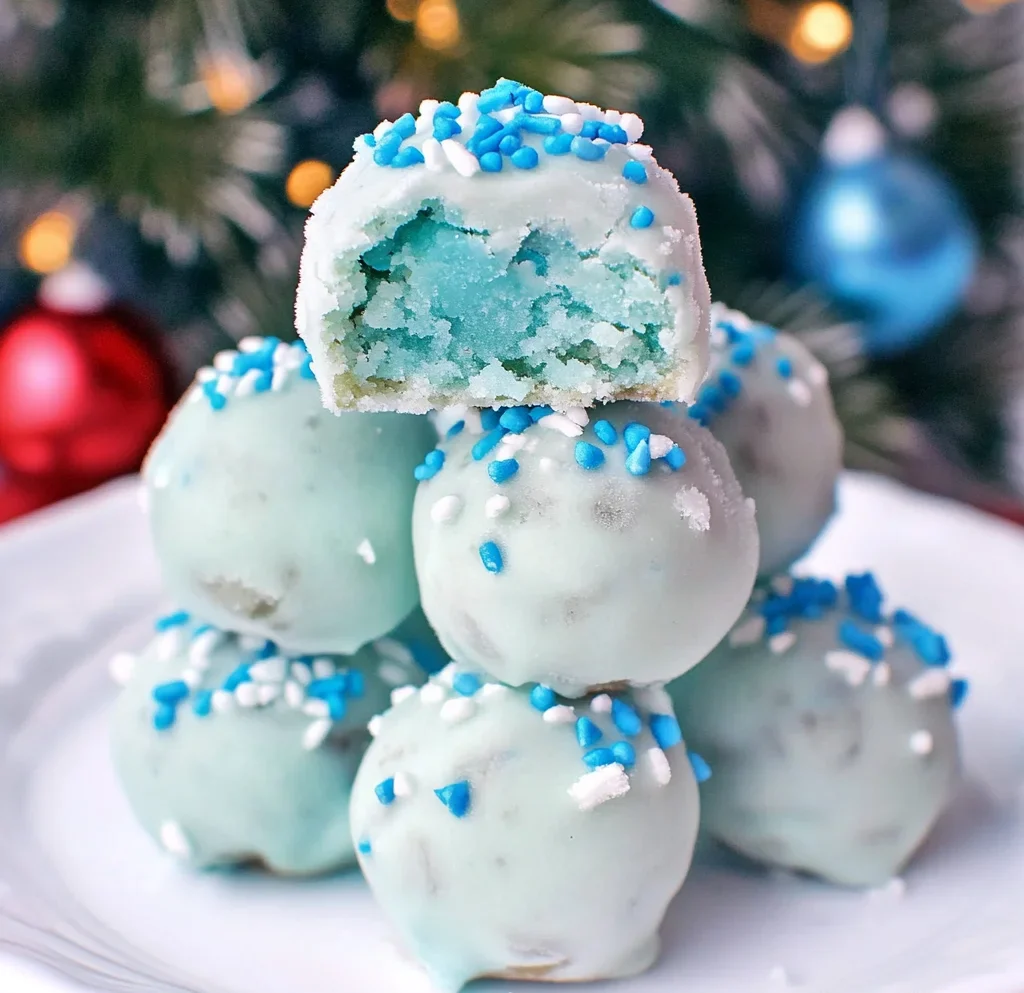
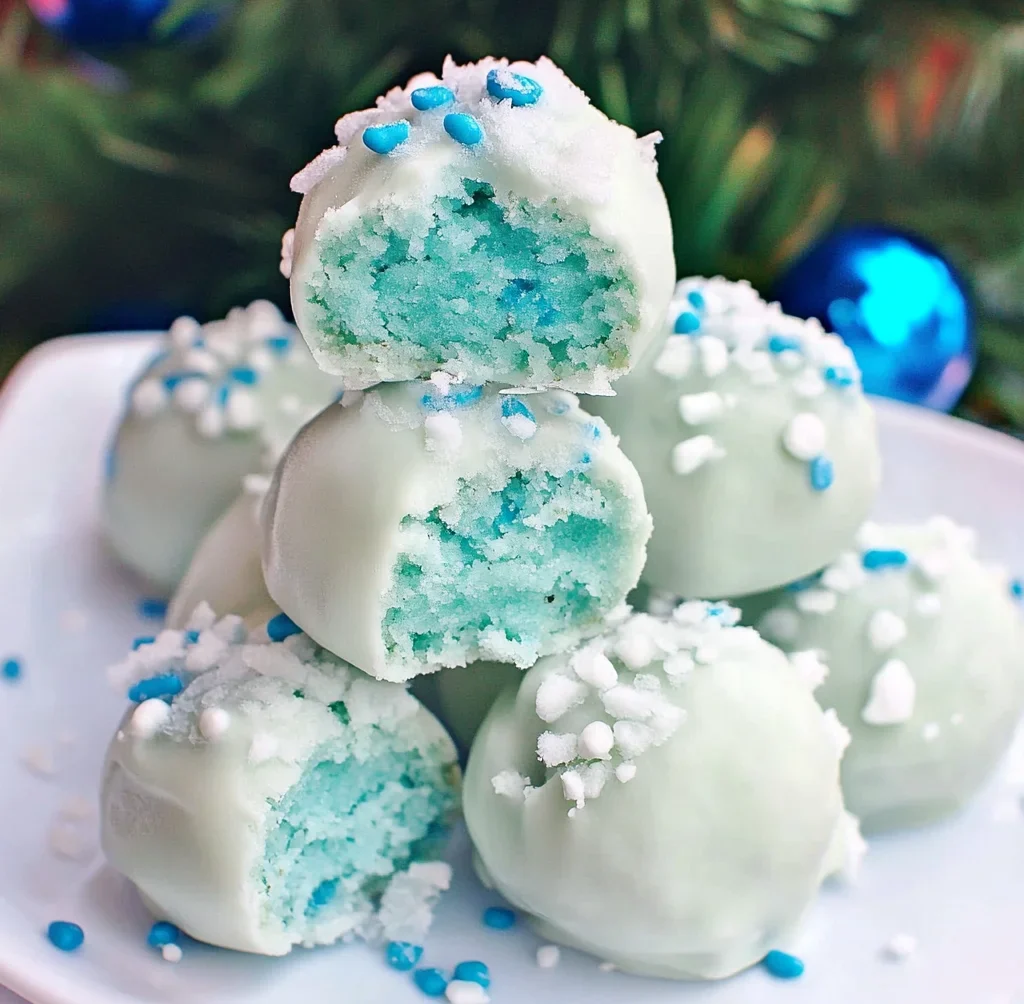
These Frozen Cake Pops are not only a delightful winter treat but also an exciting way to celebrate the release of the new Frozen II movie! Their stunning blue and white colors make them perfect for parties, holiday gatherings, or just a fun family dessert. With a simple recipe that combines delicious cake and creamy chocolate, these cake pops are sure to please everyone.
Why You’ll Love This Recipe
- Easy to Make: This recipe is straightforward, making it perfect for bakers of all skill levels.
- Fun for All Occasions: Whether it’s a birthday party or a cozy movie night, Frozen Cake Pops fit right in.
- Customizable: Change up the frosting color or sprinkles to match any theme or occasion.
- Great for Kids: Little hands love helping to shape the cake pops and decorate them!
- Deliciously Tasty: The combination of funfetti cake and rich chocolate is always a hit.
Tools and Preparation
Before diving into this fun project, gather your tools. Having everything ready will streamline the process and make baking enjoyable.
Essential Tools and Equipment
- Muffin pan
- Cupcake liners
- Mixing bowl
- Fork or chopsticks
- Double boiler
Importance of Each Tool
- Muffin pan: Essential for baking uniform cupcakes that you will crumble into cake pop dough.
- Mixing bowl: Necessary for combining ingredients and mixing crumbled cake with frosting.
- Double boiler: Allows you to melt chocolate evenly without burning it, ensuring a smooth coating.
Ingredients
These cool Frozen Cake Pops are gorgeous winter treats and they’re as tasty as they look! Perfect to celebrate the release of the new Frozen II movie!
For the Cake
- 1 Box Funfetti Cake Mix (+ ingredients listed on box)
For the Frosting
- 1 Container Blue frosting OR Vanilla Frosting + blue food coloring
For Coating
- 1 Bag Ghirardelli White Chocolate Melting Wafers
For Garnish (Optional)
- Blue and White Confetti Sprinkles
How to Make Frozen Cake Pops
Step 1: Preheat the Oven
Preheat your oven to 350°F. Prepare a muffin pan by lining it with cupcake liners.
Step 2: Bake the Cupcakes
Mix up the cake batter according to package directions. Scoop the batter into your prepared cupcake pan. Bake at 350°F for about 21 minutes or until done.
Step 3: Cool and Crumble
Remove from the oven and carefully take out the cupcakes from the pan. Allow them to cool completely before removing the liners. Once cool, crumble the cake into a mixing bowl.
Step 4: Add Frosting
Add about 1/2 tablespoon of frosting to the crumbled cake mixture. Mix until combined. Continue adding frosting as needed until you achieve a thick dough-like consistency.
Step 5: Form Cake Balls
Using approximately 1 tablespoon of batter for each ball, form small balls of dough. If you plan on making cake pops, now is the time to insert sticks into some of them.
Step 6: Freeze Cake Balls
Place your formed cake balls onto a plate and put them in the freezer for about 30 minutes until they are set.
Step 7: Melt Chocolate
While your cake balls freeze, prepare your white chocolate using a double boiler until it is smooth.
Step 8: Dip in Chocolate
Using a fork or chopsticks, carefully dip each frozen cake ball into melted white chocolate until fully coated. Allow any excess chocolate to drip back into the bowl.
Step 9: Add Sprinkles
Place your coated cake balls back onto a plate or cookie sheet. While still wet, sprinkle confetti sprinkles on top for an extra festive touch.
Step 10: Set Chocolate
Allow your chocolate coating to set completely before serving. Enjoy these delicious Frozen Cake Pops with family and friends!
How to Serve Frozen Cake Pops
Serving Frozen Cake Pops can be a delightful experience, making them perfect for parties, gatherings, or a cozy family night. Here are some fun ideas on how to present these tasty treats.
Fun Party Platter
- Arrange the cake pops on a colorful platter for an eye-catching display. Use various heights by placing some on cupcake stands to create visual interest.
Hot Chocolate Pairing
- Serve your Frozen Cake Pops alongside cups of hot chocolate. The warm drink contrasts beautifully with the cold cake pops, enhancing the flavor experience.
Birthday Celebrations
- Include Frozen Cake Pops as part of a birthday dessert table. They can be themed to match any party decor by using colored sprinkles and frosting.
Snack Bar Setup
- Create a DIY snack bar where guests can customize their cake pops with different toppings like nuts, extra sprinkles, or drizzles of chocolate.
Movie Night Treats
- Present these cake pops during movie nights, especially when watching winter-themed films like Frozen II. It adds a festive touch to your viewing experience.
How to Perfect Frozen Cake Pops
To ensure your Frozen Cake Pops turn out perfectly every time, follow these simple tips.
- Choose Quality Ingredients: Use high-quality cake mix and chocolate for the best flavor and texture.
- Cool Completely: Make sure that the cake balls are completely cool before dipping in chocolate; this prevents melting.
- Use Candy Melts: If you want vibrant colors, opt for candy melts instead of standard chocolate. They come in various shades.
- Work Quickly: Dip the cake pops in melted chocolate quickly before it sets to maintain a smooth finish.
- Add Toppings Immediately: Sprinkle toppings right after dipping while the chocolate is still wet for better adherence.
- Store Properly: Keep your finished Frozen Cake Pops in the freezer until ready to serve to maintain their firmness.
Best Side Dishes for Frozen Cake Pops
Pairing side dishes with your Frozen Cake Pops can elevate any occasion. Here are some delicious suggestions that complement these sweet treats well.
- Fruit Skewers: Fresh fruit on skewers adds a refreshing balance of flavors and colors.
- Cheese Platter: A selection of cheeses works well with the sweetness of cake pops, offering savory contrast.
- Mini Sandwiches: Small sandwiches are easy to grab and provide a hearty option alongside dessert.
- Veggie Cups: Individual cups filled with assorted veggies and dip add a crunchy element to your spread.
- Popcorn Bar: Offer different popcorn flavors as a fun snack option that pairs well with sweet treats.
- Ice Cream Sundae Station: Let guests create their own sundaes while enjoying cake pops for an ultimate dessert experience.
Common Mistakes to Avoid
Making Frozen Cake Pops can be a delightful experience, but some common pitfalls might lead to less-than-perfect results. Here are some mistakes to watch out for:
- Overmixing the batter: Mixing too long can lead to a dense cake. Follow the package directions closely and mix just until combined for the best texture.
- Not cooling the cake properly: If you rush this step, the cake may not crumble easily. Allowing it to cool completely is essential for forming perfect cake balls.
- Using too much frosting: Adding too much frosting can make your mixture too wet. Start with a small amount and gradually add more until you reach a dough-like consistency.
- Skipping the freezing step: Not chilling your cake balls can result in them falling apart when dipped in chocolate. Freezing is crucial for ensuring they hold their shape.
- Forgetting to coat quickly: If you wait too long after melting the chocolate, it may harden before you coat your cake pops. Work efficiently while dipping to achieve a smooth finish.
Refrigerator Storage
- Store in an airtight container for up to 5 days.
- Place parchment paper between layers of cake pops to prevent sticking.
Freezing Frozen Cake Pops
- Freeze them in an airtight container for up to 3 months.
- Use wax paper between layers if stacking them in one container.
Reheating Frozen Cake Pops
- Oven: Preheat to 300°F, place on a baking sheet, and warm for about 5-10 minutes.
- Microwave: Heat on low power for 10-15 seconds at a time until warm.
- Stovetop: Use a covered pan on low heat for 5-7 minutes, turning occasionally.
Frequently Asked Questions
How long do Frozen Cake Pops last?
Frozen Cake Pops can last up to 3 months in the freezer when stored properly.
Can I customize my Frozen Cake Pops?
Yes! You can customize these treats with different flavors of frosting or colorful sprinkles.
What is the best way to dip Frozen Cake Pops?
To dip, use a fork or chopsticks, ensuring each ball is fully coated and allowing excess chocolate to drip off.
Can I make these Frozen Cake Pops ahead of time?
Absolutely! These treats are perfect for making ahead of time as they store well in both the fridge and freezer.
Final Thoughts
These Frozen Cake Pops are not only visually stunning but also incredibly versatile. They make an excellent treat for celebrations or family gatherings. Feel free to experiment with different flavors and decorations to suit your taste preferences! Try making them today and enjoy this fun dessert that everyone will love!
Frozen Cake Pops
Indulge in the magic of winter with these delightful Frozen Cake Pops, perfect for celebrating the enchanting world of Frozen II. These charming treats boast vibrant blue and white hues, making them an eye-catching addition to any party or holiday gathering. With a simple recipe that combines soft funfetti cake and rich, creamy chocolate, these cake pops are not only visually appealing but also irresistibly delicious. Whether you’re hosting a birthday bash, cozy movie night, or festive family dessert, these cake pops will surely impress guests of all ages. Easy to make and fun to customize, they can be decorated to fit any theme. Join the fun and whip up a batch of these tasty treats that everyone will love!
- Prep Time: 20 minutes
- Cook Time: 21 minutes
- Total Time: 41 minutes
- Yield: Approximately 12 servings 1x
- Category: Dessert
- Method: Baking
- Cuisine: American
Ingredients
- 1 box Funfetti Cake Mix (plus ingredients listed on the box)
- 1 container blue frosting or vanilla frosting with blue food coloring
- 1 bag Ghirardelli white chocolate melting wafers
- Optional: Blue and white confetti sprinkles
Instructions
- Preheat oven to 350°F and line a muffin pan with cupcake liners.
- Prepare cake batter according to package directions and pour into liners. Bake for 21 minutes or until done.
- Allow cupcakes to cool completely before crumbling into a mixing bowl.
- Mix in frosting gradually until you reach a moldable dough-like consistency.
- Form small balls (about 1 tablespoon each) and insert sticks if making cake pops.
- Freeze cake balls for about 30 minutes.
- Melt white chocolate using a double boiler until smooth.
- Dip each frozen ball into melted chocolate, allowing excess to drip off.
- While still wet, add sprinkles for decoration.
- Let chocolate set completely before serving.
Nutrition
- Serving Size: 1 serving
- Calories: 160
- Sugar: 14g
- Sodium: 50mg
- Fat: 7g
- Saturated Fat: 4g
- Unsaturated Fat: 2g
- Trans Fat: 0g
- Carbohydrates: 22g
- Fiber: 0g
- Protein: 2g
- Cholesterol: 10mg
Leave a Comment