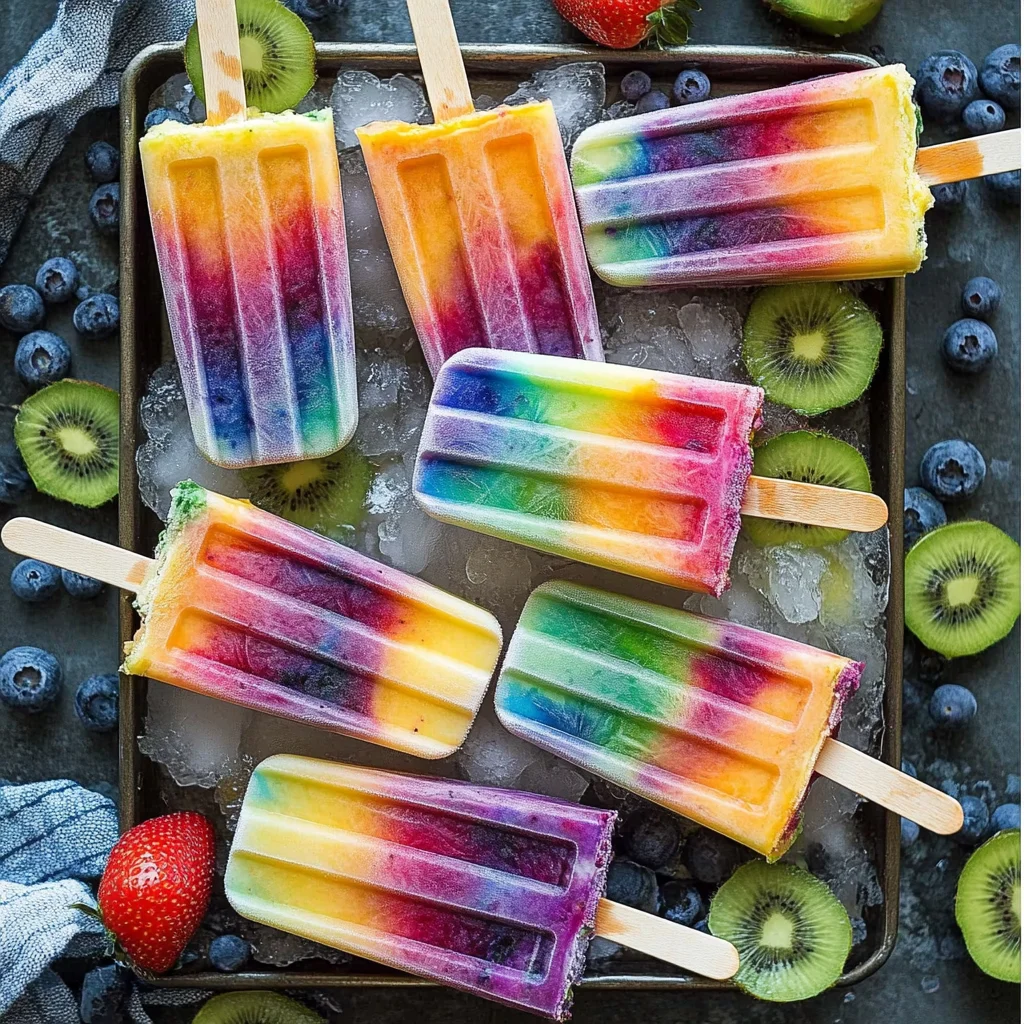
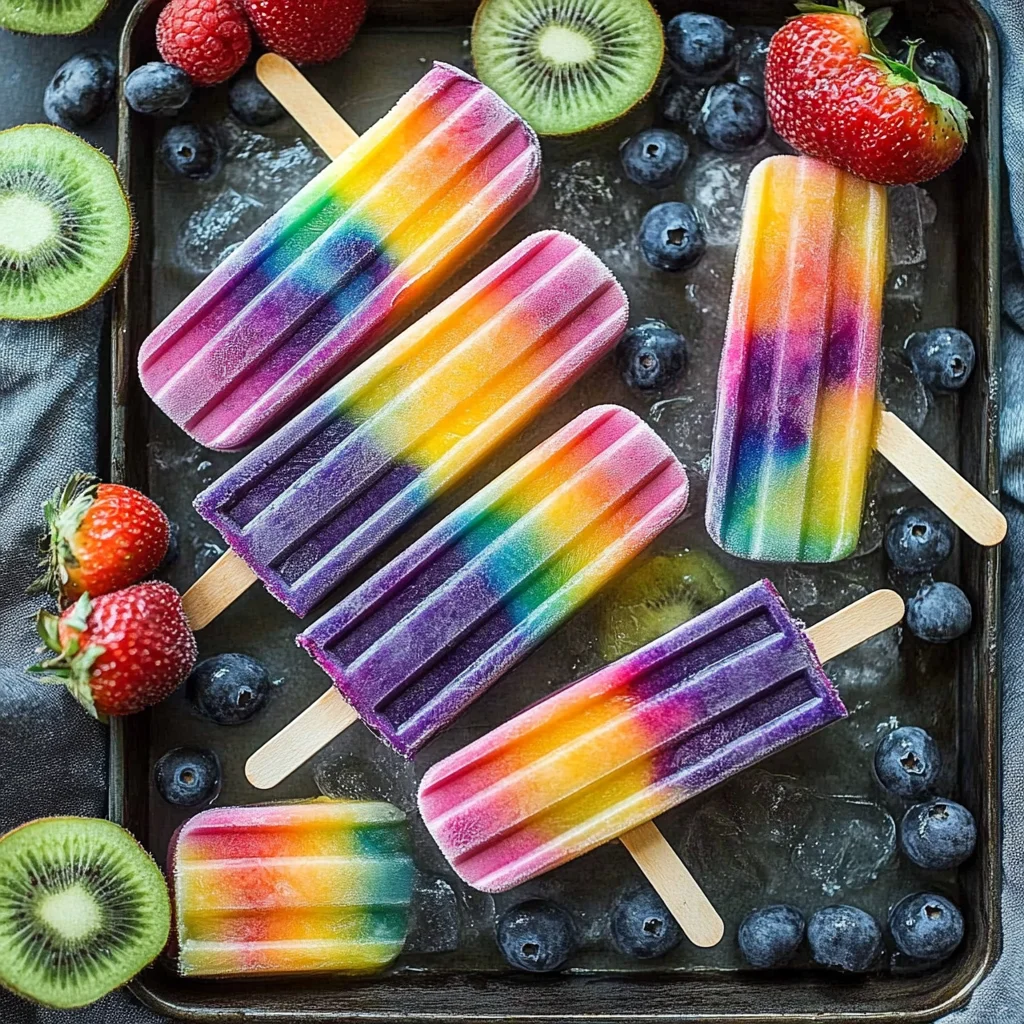
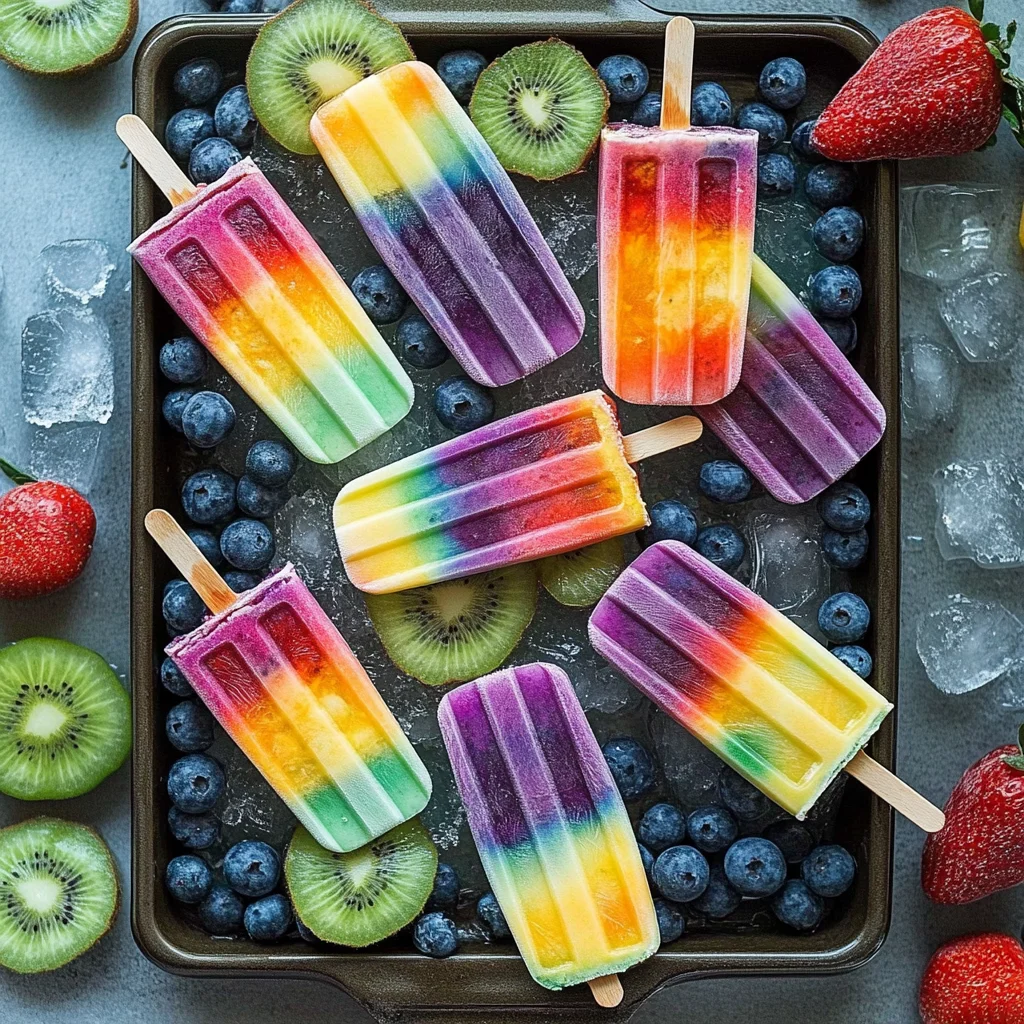
Outstanding 7 layer rainbow popsicles! These Rainbow Popsicles are not only a feast for the eyes but also a delicious way to enjoy fresh fruit. Perfect for summer parties, kids’ snacks, or a fun dessert, these popsicles are simple to make and bursting with fruity flavors. Their vibrant colors and natural sweetness make them an ideal treat for any occasion.
Why You’ll Love This Recipe
- Versatile Flavors: Customize your rainbow popsicles with your favorite fruits for endless combinations.
- Healthy Treat: Packed with nutritious ingredients, they are a guilt-free dessert option.
- Fun for Kids: Get the little ones involved in the kitchen by letting them help layer their favorite fruits.
- Visual Appeal: The colorful layers create a stunning presentation that will impress your guests.
- Easy to Make: With simple steps and minimal prep, these popsicles come together quickly.
Tools and Preparation
Creating your rainbow popsicles is easy with the right tools. Gather these essentials to streamline your process.
Essential Tools and Equipment
- Blender
- Popsicle molds
- Measuring cups
- Spatula
Importance of Each Tool
- Blender: A high-quality blender ensures smooth mixtures, making it easier to layer the popsicles without chunks.
- Popsicle molds: Choosing the right mold helps create perfectly shaped treats that pop out easily.
- Measuring cups: Accurate measurements guarantee consistent flavors across all layers.
Ingredients
For the First Layer
- 1 frozen banana
- 1/2 cup (113g) greek yogurt (vanilla or plain)
- 1/2 cup frozen raspberries
- 1/2 cup frozen strawberries
- water or liquid for blending
For the Second Layer
- 1 frozen banana
- 1/2 cup (113g) greek yogurt (vanilla or plain)
- 1/2 cup frozen peaches
- 1 small orange
- 1/4 cup frozen mango
- water or liquid for blending
For the Third Layer
- 2 frozen bananas
- 1/2 cup (113g) greek yogurt (vanilla or plain)
- 1 cup frozen pineapple
- water or liquid for blending
For the Fourth Layer
- 2 frozen bananas
- 1/2 cup (113g) greek yogurt (vanilla or plain)
- 1 handful (or more) spinach
- 1 cup frozen pineapple
- water or liquid for blending
For the Fifth Layer
- 2 frozen bananas
- 1/2 cup (113g) greek yogurt (vanilla or plain)
- 1 cup frozen pineapple
- small amount of blue food coloring
- water or liquid for blending
For the Sixth Layer
- 1 frozen banana
- 1/2 cup (113g) greek yogurt (vanilla or plain)
- 1 cup frozen mixed berries
- water or liquid for blending
For the Seventh Layer
- 1 frozen banana
- 1/2 cup (113g) greek yogurt (vanilla or plain)
- 1/2 cup sliced canned beets
- 1 cup frozen strawberries or raspberries
For Garnish
- 2 tablespoons fresh parsley, finely chopped
How to Make Rainbow Popsicles
Step 1: Prepare Your Ingredients
Gather all your ingredients and ensure they are properly measured. This makes blending each layer easier.
Step 2: Blend the First Layer
Blend together the ingredients for the first layer until smooth. Pour into your popsicle molds, filling them about one-seventh full.
Step 3: Freeze First Layer
Place the molds in the freezer for about 30 minutes until partially set.
Step 4: Repeat for Remaining Layers
Repeat steps 2 and 3 for each subsequent layer, ensuring each layer is slightly set before adding the next one. This creates distinct colorful layers.
Step 5: Final Freeze
Once all layers are added, freeze the popsicles completely, usually about 4-6 hours.
Step 6: Serve
To remove from molds, run warm water over them briefly. Enjoy your homemade Rainbow Popsicles as a refreshing treat!
How to Serve Rainbow Popsicles
Rainbow popsicles are not only a treat for the taste buds but also a feast for the eyes. Serving them creatively can enhance the enjoyment of these colorful delights.
Fun Party Platter
- Arrange a variety of rainbow popsicles on a large platter. This colorful display will attract guests of all ages and make your party more festive.
Kids’ Snack Time
- Offer rainbow popsicles during snack time to encourage kids to enjoy healthy fruit while having fun. Pair them with some fresh fruit slices for added nutrition.
Refreshing Summer Treat
- Serve rainbow popsicles at summer barbecues or picnics. They are a perfect way to cool off and keep everyone refreshed in the heat.
Dessert at Dinner
- Present rainbow popsicles as a unique dessert option after dinner. Their vibrant colors can excite even the pickiest eaters and serve as a great conversation starter.
How to Perfect Rainbow Popsicles
Creating the perfect rainbow popsicles requires attention to detail and creativity. Here are some tips to elevate your homemade popsicle experience.
- Use fresh ingredients: Fresh fruits will provide better flavor and texture than frozen ones, ensuring your popsicles taste delicious.
- Layer carefully: Pour each layer slowly and let it freeze slightly before adding the next one. This helps maintain distinct layers for a beautiful presentation.
- Experiment with flavors: Don’t be afraid to mix different fruits or add herbs like mint for unique flavors that surprise your palate.
- Choose the right molds: Using silicone molds can make it easier to remove your popsicles once they’re frozen, preventing breakage.
- Add some sweetness: If you find the fruit too tart, consider adding a little honey or agave syrup for extra sweetness without losing the natural fruit flavor.
Best Side Dishes for Rainbow Popsicles
Rainbow popsicles pair well with various side dishes that complement their fruity flavors. Here’s a list of tasty options.
- Fruit Salad: A mix of seasonal fruits adds freshness and pairs beautifully with the sweet flavors of rainbow popsicles.
- Yogurt Parfaits: Layer yogurt with granola and berries for a creamy, crunchy side that enhances the fruity experience.
- Veggie Sticks with Dip: Crunchy veggies like carrots and cucumbers served with hummus or ranch dip provide a balanced snack option.
- Cheese Platter: A selection of cheeses can offer savory notes that contrast nicely with sweet popsicles, creating an interesting flavor balance.
- Granola Bars: Homemade or store-bought granola bars can serve as an excellent side, providing energy alongside fruity refreshment.
- Mini Sandwiches: Small sandwiches filled with light ingredients such as turkey or cream cheese make for a satisfying pairing with popsicles.
- Popcorn Mix: A sweetened popcorn mix can add crunch and fun textures; toss in some dried fruits or nuts for extra flair.
- Chips and Salsa: For those who love salty snacks, crispy tortilla chips served with mild salsa can be an unexpected yet delightful side dish.
Common Mistakes to Avoid
Making Rainbow Popsicles can be fun, but there are a few common pitfalls to watch out for.
- Using too much liquid: Adding excess water or blending liquid can make your popsicles too icy. Use just enough to blend the ingredients smoothly.
- Skipping the layering process: If you don’t layer each color carefully, your popsicles may turn out muddy instead of vibrant. Take your time and freeze each layer before adding the next.
- Not using ripe fruit: Using under-ripe fruit can result in less flavor and sweetness. Choose ripe, fresh fruits for the best taste.
- Ignoring freezing times: If you don’t freeze the layers long enough, they may mix together. Ensure each layer is fully frozen before adding the next one.
- Choosing low-quality molds: Cheap molds can break easily or may not release popsicles well. Invest in good quality silicone molds for easy removal.
Storage & Reheating Instructions
Refrigerator Storage
- Store leftover Rainbow Popsicles in an airtight container in the refrigerator for up to 2 days.
- Make sure to keep them covered to prevent drying out.
Freezing Rainbow Popsicles
- Place popsicles in a freezer-safe container or bag if storing for longer than 2 days.
- They can be frozen for up to 3 months for optimal taste and texture.
Reheating Rainbow Popsicles
- Oven: Not recommended for popsicles as they will melt quickly.
- Microwave: Heat on low power for a few seconds until slightly softened; monitor closely to avoid melting too much.
- Stovetop: Not applicable; these treats are best enjoyed frozen!
Frequently Asked Questions
What are Rainbow Popsicles?
Rainbow Popsicles are colorful frozen treats made with layers of blended fruits and yogurt, creating a beautiful rainbow effect.
How do I customize my Rainbow Popsicles?
You can customize your Rainbow Popsicles by using different fruits, yogurt flavors, or even adding superfoods like chia seeds or protein powder.
Can I use fresh fruit instead of frozen?
Yes, you can use fresh fruit! Just add ice or extra liquid when blending to achieve the right consistency.
How long do Rainbow Popsicles take to freeze?
Typically, it takes about 6-8 hours for Rainbow Popsicles to freeze completely, depending on your freezer settings.
Are Rainbow Popsicles healthy?
Absolutely! These popsicles are made from fresh fruit and yogurt, making them a nutritious snack option that’s low in calories.
Final Thoughts
Rainbow Popsicles are a delightful treat that everyone can enjoy during hot weather. Their bright colors and fruity flavors make them visually appealing and satisfying. Feel free to experiment with different fruits and flavors to create your perfect version. Enjoy making these homemade popsicles with your family!
Rainbow Popsicles
Indulge in the vibrancy of summer with these delightful Rainbow Popsicles! Bursting with fruity flavors and a kaleidoscope of colors, these layered frozen treats are perfect for cooling off on hot days. They not only please the palate but also provide a nutritious alternative to store-bought ice pops, making them ideal for kids and adults alike. With just a handful of fresh fruits and yogurt, you can create a visually stunning dessert that’s both healthy and fun to make. Gather your favorite fruits, invite the kids into the kitchen, and enjoy a refreshing treat that will brighten any occasion.
- Prep Time: 20 minutes
- Cook Time: 6 hours
- Total Time: 6 hours 20 minutes
- Yield: 7 servings
- Category: Dessert
- Method: Freezing
- Cuisine: American
Ingredients
- Frozen banana
- Greek yogurt (vanilla or plain)
- Frozen raspberries
- Frozen strawberries
- Frozen peaches
- Orange
- Frozen pineapple
- Spinach
- Blue food coloring
- Frozen mixed berries
- Canned beets
Instructions
- Prepare all ingredients by measuring them accurately.
- Blend the first layer ingredients until smooth, pour into popsicle molds, and freeze for 30 minutes.
- Repeat blending and freezing steps for each subsequent layer, allowing each layer to set slightly before adding the next.
- After adding all layers, freeze the popsicles completely for 4-6 hours.
- To serve, run warm water over the molds briefly to release the popsicles.
Nutrition
- Serving Size: 1 serving
- Calories: 75
- Sugar: 9g
- Sodium: 30mg
- Fat: 1g
- Saturated Fat: 0g
- Unsaturated Fat: 0g
- Trans Fat: 0g
- Carbohydrates: 16g
- Fiber: 2g
- Protein: 3g
- Cholesterol: 5mg
Leave a Comment